Taking the Tour: Mapillary in Esri Story Maps

Esri Story Maps are meant for telling stories with a combination of text, images, and multimedia content. They are also a great method for quickly sharing interesting Mapillary sequences, particularly if you want to thread them together into one narrative.
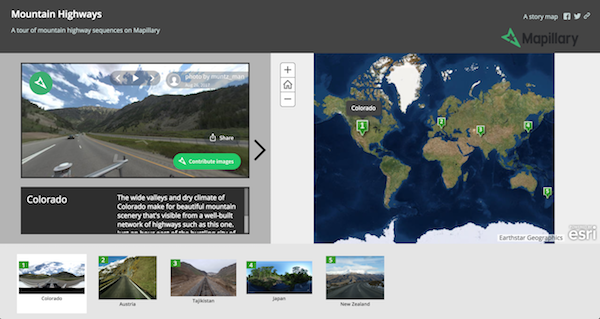
Among the many useful options that Esri offers for constructing your own Story Map, the best template for Mapillary is the map tour format. Today we’ll walk through how to build your very own story map with embedded Mapillary sequences.
You’ll need an ArcGIS Online account, either as an individual or an organization. You’ll also need to choose a few sequences from Mapillary that will help build your narrative, whether they are from your own voyages or those of other users.
Overall, you need just two resources to come back to:
Explore Mapillary to find your sequences at https://www.mapillary.com/app
Click
Build a Map Tourto start building your map at https://storymaps.arcgis.com/en/app-list/map-tour/?buildApp=true
Before opening the map tour builder, we’ll choose our sequences. We’ll visit the Mapillary global map and find images from mountain highways. For each image, we’ll save the embed link that Mapillary provides, trim away some of the HTML around it, and add it to our list. Finally, we’ll go to the map tour builder and use these links to populate our story, while adding some content and style.
Step 1: Exploring with Mapillary
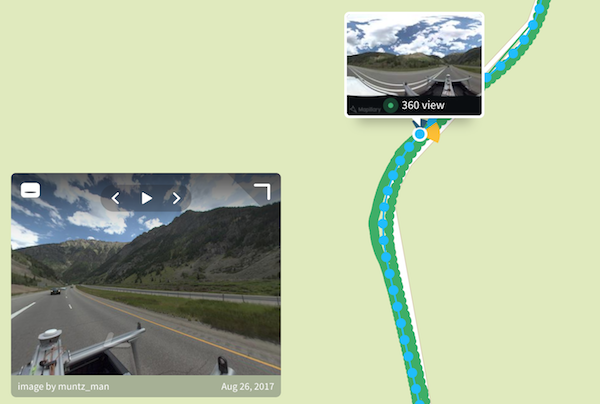
To start, we’ll head to high-altitude Colorado and explore some imagery in the mountains. I found a great 360-degree image by Mapillary contributor muntz_man, so this one will be first on our list.
On the right side of the viewer, there’s a share button where we can get different sharing links for our chosen image. Click this icon, then when the share popup opens, make sure to highlight Image only and click Get embed code. The code will take a moment to generate, then you’ll see Your embed code followed by a line of HTML. Copy this to a safe place, and we’ll make some edits.
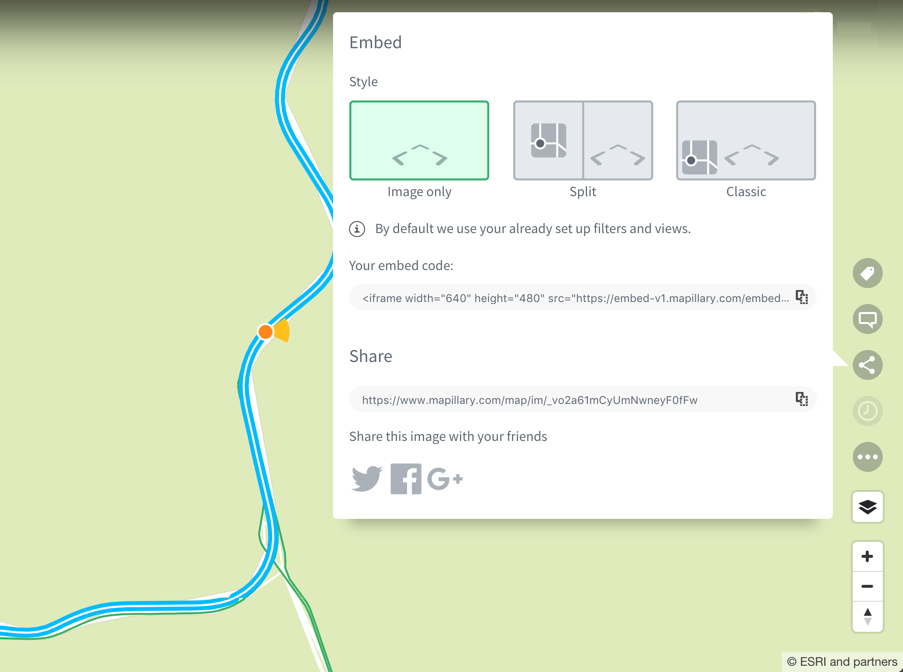
The initial embed code is intended for placing an interactive sequence such as this one inside your website, blog, or other platform. For our story map, we just need the link, so everything inside the quotes of the src parameter. For example, the original embed code is below:
<iframe width="640" height="480" src="https://embed-v1.mapillary.com/embed?version=1&filter=%5B%22all%22%5D&map_filter=%5B%22all%22%5D&map_style=esri&image_key=_vo2a61mCyUmNwneyF0fFw&x=0.632795422738881&y=0.42928968123333755&client_id=UTZhSnNFdGpxSEFFREUwb01GYzlXZzpjODczYmIzYzQ3NGMzMGZm&style=photo" frameborder="0"></iframe>
And the link we’ve extracted from this is:
https://embed-v1.mapillary.com/embed?version=1&filter=%5B%22all%22%5D&map_filter=%5B%22all%22%5D&map_style=esri&image_key=_vo2a61mCyUmNwneyF0fFw&x=0.632795422738881&y=0.42928968123333755&client_id=UTZhSnNFdGpxSEFFREUwb01GYzlXZzpjODczYmIzYzQ3NGMzMGZm&style=photo
Next, we need the image key and the geographic coordinates of the image. We can extract this from the URL of the Mapillary page we are on (not the embed link). Go to the search bar at the top of the page and you’ll notice the URL such as this:
https://www.mapillary.com/app/?pKey=_vo2a61mCyUmNwneyF0fFw&focus=photo&lat=39.52166083333333&lng=-106.14442138888887&z=17
This URL has the geographic coordinates in lat= and lng=. We will want to copy these down alongside the embed link, so I’ve copied and pasted them to my notes like below:
lat=39.52166083333333
lng=-106.14442138888887
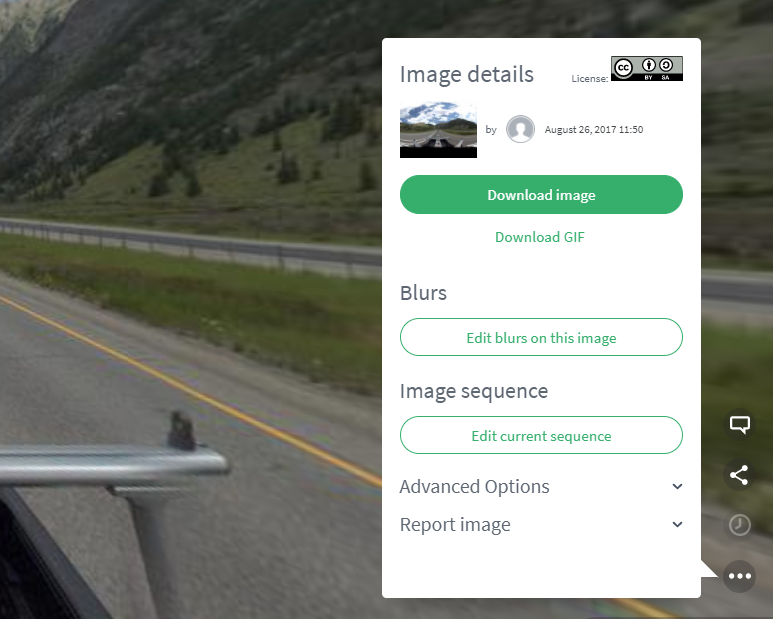
Finally, we need to get a link to the thumbnail of the image. We’ll click the three dots (...) icon at the bottom right of the Mapillary viewer, then right-click on Download image and select Copy link address. Pasting this alongside the embed link, we’ll have a URL like https://images.mapillary.com/_vo2a61mCyUmNwneyF0fFw/thumb-2048.jpg.
My complete notes for this image look like:
Embed: https://embed-v1.mapillary.com/embed?version=1&filter=%5B%22all%22%5D&map_filter=%5B%22all%22%5D&map_style=esri&image_key=_vo2a61mCyUmNwneyF0fFw&x=0.632795422738881&y=0.42928968123333755&client_id=UTZhSnNFdGpxSEFFREUwb01GYzlXZzpjODczYmIzYzQ3NGMzMGZm&style=photo
Latitude: lat=39.52166083333333
Longitude: lng=-106.14442138888887
Thumb: https://images.mapillary.com/_vo2a61mCyUmNwneyF0fFw/thumb-2048.jpg
After this I’ve moved on to a few more locations: Austria, Tajikistan, Japan, and New Zealand. I repeated the above steps to form a complete list of embed links, image keys, and geographic coordinates for all five locations. I now have a list of five links that I can embed into my story map tour. Next, we’ll add these into our story map, one by one.
Step 2: Storytelling with Esri
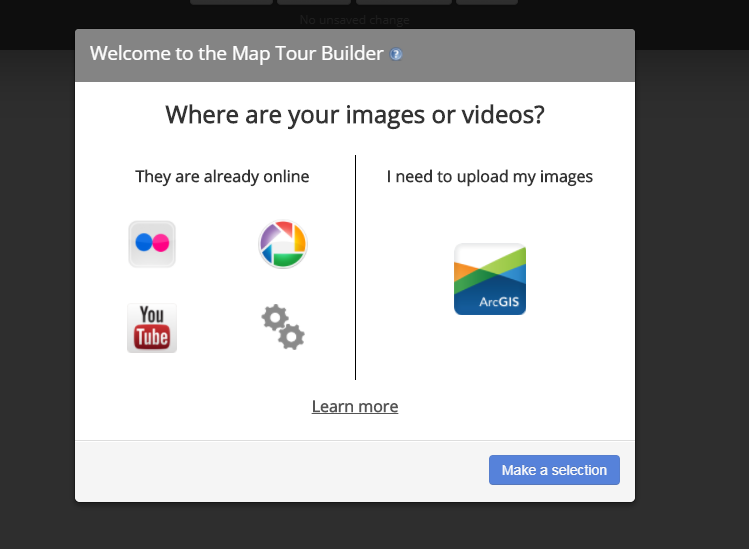
Once you’ve launched the Map Tour Builder, you’ll get an initial prompt which asks about the source of your images or video. We’ll simply click the Advanced options button.
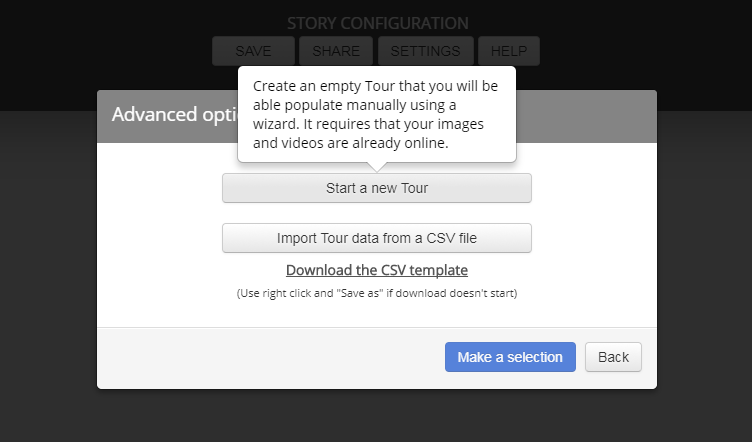
This will prompt us to a new window, where we will select Start a new Tour. This will create an empty project which we can populate with our images.
To get started with our map, we’ll click Add to add our first featured location in Colorado. When selecting what type of media to add, click Video, then select Other, because our interactive viewer works much the same as an embedded streaming video might.
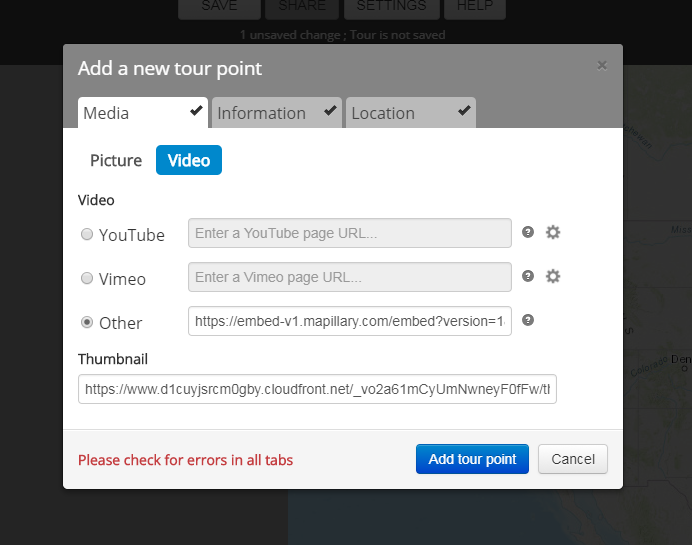
We’ll add the link; in this case, to the field asking for a YouTube page URL:
https://embed-v1.mapillary.com/embed?version=1&filter=%5B%22all%22%5D&map_filter=%5B%22all%22%5D&map_style=esri&image_key=_vo2a61mCyUmNwneyF0fFw&x=0.632795422738881&y=0.42928968123333755&client_id=UTZhSnNFdGpxSEFFREUwb01GYzlXZzpjODczYmIzYzQ3NGMzMGZm&style=photo
Next, we can select a thumbnail. We will need to use the thumbnail link we acquired, so in our case:
https://images.mapillary.com/_vo2a61mCyUmNwneyF0fFw/thumb-2048.jpg
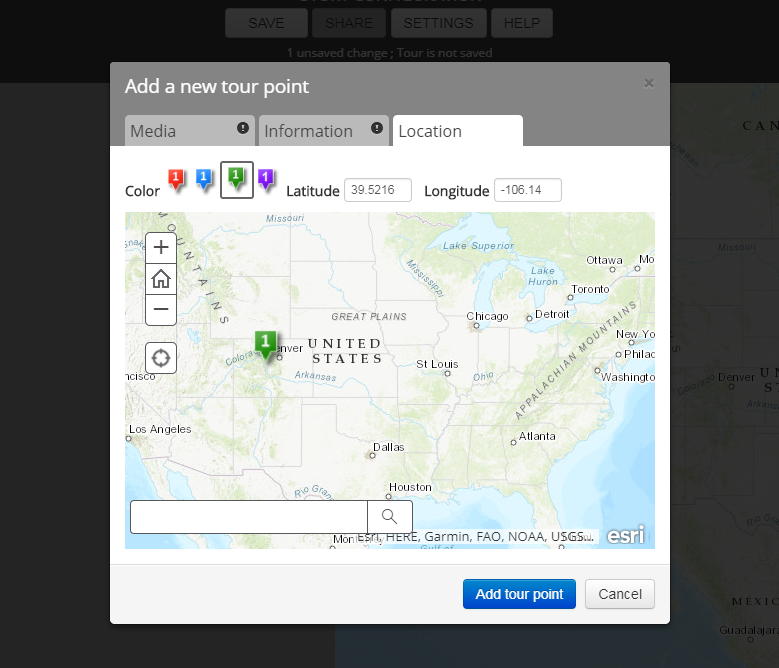
Next, we click on the Location tab to add in the last element that we took from the Mapillary URL—the geographic coordinates. These are easily pasted in the Latitude and Longitude fields. We can also choose a color for the marker that will represent the point where our image is located. You can see that I chose green, but we can change this for each point on the tour.
Finally, we can add information about our Mapillary media by clicking the Information tab. I’ve added the title Colorado and a few phrases that give context to the visual.
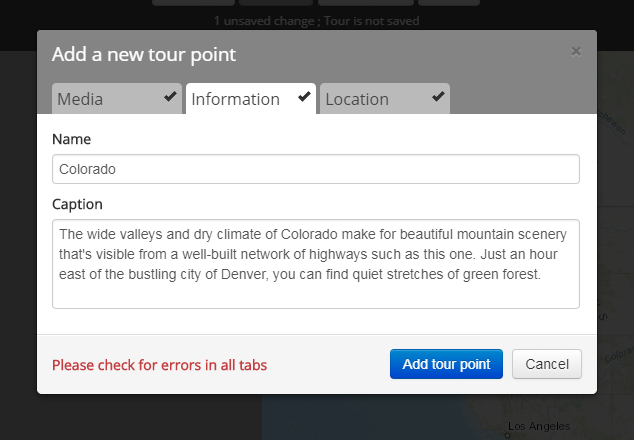
Finally, click Add tour point. This will add the first Mapillary image as a slide in the bottom span using the thumbnail, as well as placing the point on the map and loading the Mapillary viewer at the left.
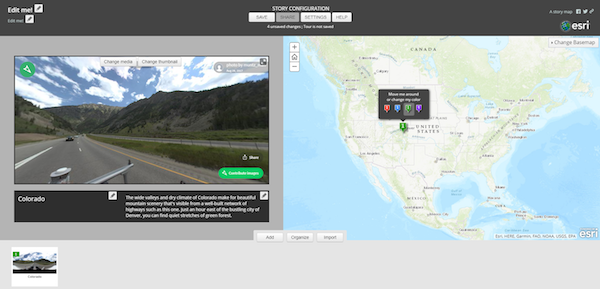
Once you’ve made it this far, you simply need to repeat these steps for your remaining images. I finished adding all five that I selected, clicked at the top left where it reads Edit me! to add a title, then clicked Change Basemap at the top right to add a satellite map that shows off the rugged mountain areas better. Finally, I hit Save at the top of the builder.
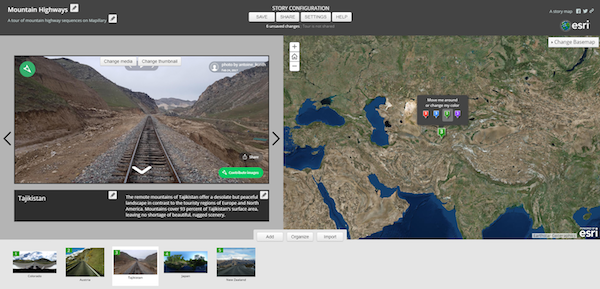
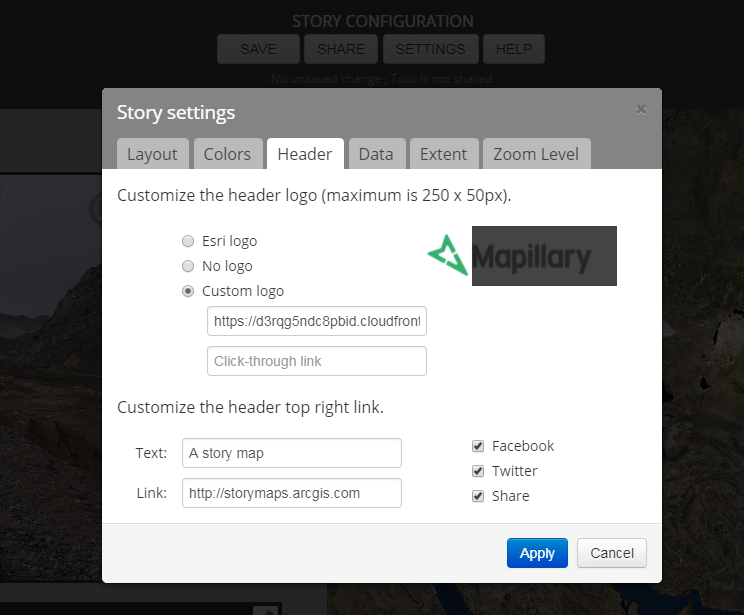
You can also click Settings to experiment with other color schemes, change the initial map extent, add your own logo image at top right, and more. I’ve kept most of the default settings in this case, although I added a Mapillary logo from a URL using the Header tab. Make sure to keep saving your changes as you go.
Finally, we’re ready to publish our story! Click the Share button at the top and choose whether you want to share the story map publicly or just within your organization.
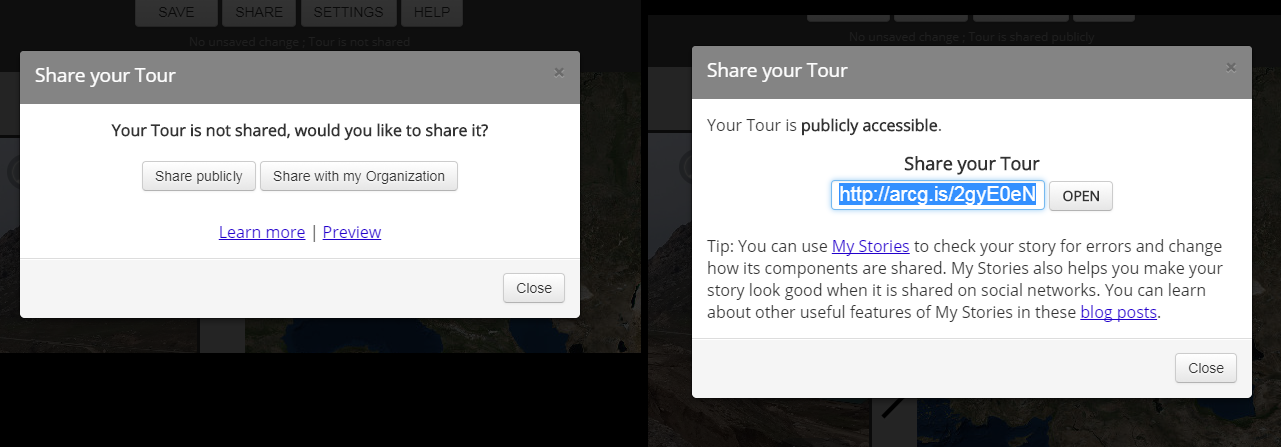
You’ll then receive a shortened link to your tour, which you can send away to your fans. You can see mine here: http://arcg.is/2gyE0eN.
If you want to create a hosted version or download the map to make further modifications to the code, as well as learn to deploy it once modified, you can consult Esri documentation. If you have additional questions, feel free to send them our way—and don’t forget to tag us on Twitter and Facebook if you want to show off your creations!
/Chris