Turn a Tesla into a mapping vehicle with Mapillary

About two years ago, Tesla enabled a dashcam feature in their vehicles, which allows Tesla drivers to access the imagery collected by the vehicle’s cameras. The mode of operation is simple: plug a USB stick in one of the vehicle's USB ports, and imagery will be saved to the USB stick automatically.

The task of getting imagery to Mapillary then boils down to getting the images stored on the USB drive to Mapillary.
Geotagging
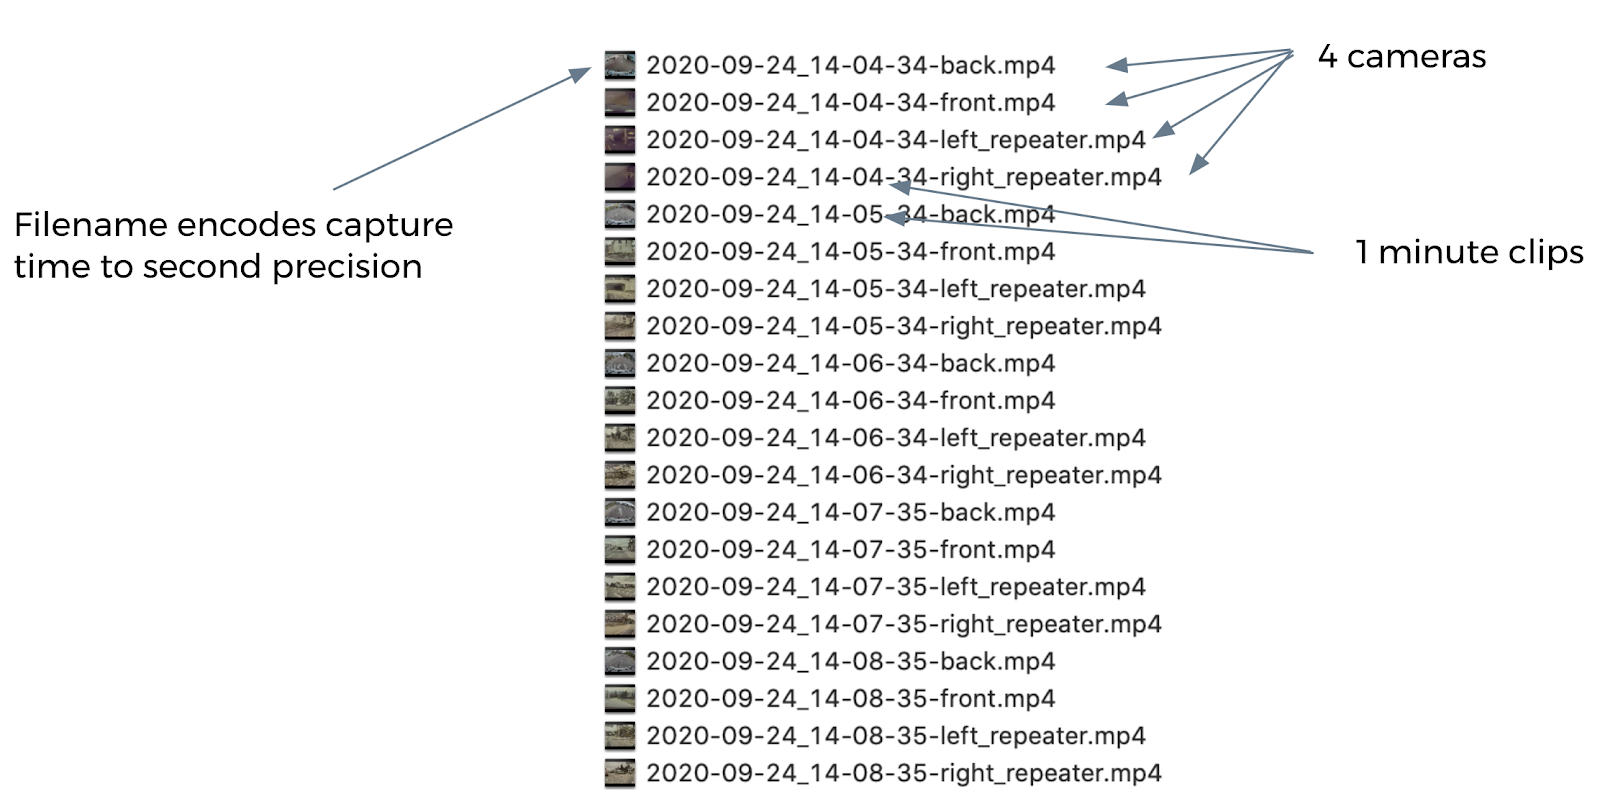
The main challenge to overcome is that Tesla does not store the GPS tracks alongside the videos on the USB drive. This means that we need to get the GPS signal from another source. The simplest way to achieve this is to use one of the GPS tracking apps available for your phone. If you download the GPS (GPX) track files to your PC alongside the clips from your dashcam, you can use Mapillary’s standard tools to align the video clips with the GPX tracks. This is achieved by associating the capture time of the video clips with the timestamps in the GPX track. Luckily, the Tesla dashcam stores a timestamp with second precision in the filename of each video clip:
Our strategy is then to align the video with the GPS track. Before we go there, I’d like to add a few comments on what type of GPS tracking app works best:
- Simple start and stop with a single button to simplify recording while driving
- GPX export with a file format that mapillary_tools can use
- Correct time, timezone, and format for GPS recording and GPX file (GPX standard is to write time in UTC)
- Easy way to get the files to your PC (email sharing, Apple AirDrop etc.)
- High enough save frequency between GPX timestamps (for driving in a car rather than say walking)
Sampling video and aligning with the GPX track
Our strategy to get the videos aligned with the GPX tracks and images for upload extracted is as follows:
- We can use Mapillary’s command line tools to sample a video clip into frames using the process_video command. We use the video_start_time parameter to set the correct capture time for the images to be extracted. The value for the video start time we derive from the video filename as indicated earlier in the article. Note that we need to use the correct timezone for your vehicle and map it to UTC, as the GPX track will be in UTC.
- We then use the process_and_upload command with the parameters … to geotag the sampled images
- The Tesla dashcam feature records output of 4 cameras (front, back, left and right) and stores them in individual files for each camera. We use the offset_angle parameter to indicate to mapillary_tools which direction the camera is facing. (0,180,-90, and 90, respectively)
- Of course, we also want to set the camera make to Tesla using the parameter offset_angle
- Finally, since we use process_and_upload the sampled images are also uploaded to Mapillary directly after processing
Following these steps, you can write your own simple (Python) script to process a set of videos and a GPX file using mapillary_tools. To make your life easier, we share a sample script here as a GIST.
A word on time and timezones
As experienced Mapillary contributors who capture with external cameras and separate GPS know, getting or setting the correct times on botched devices (GPS and Camera(s)) is crucial to achieve good results. It’s often also the most annoying step in the process.
The good news here is that both the Tesla and your mobile phones are network connected devices. This means that they get the correct time from the network, and times should be automatically aligned - the only thing to pay attention to when processing the videos is the timezone.
Inspecting the result
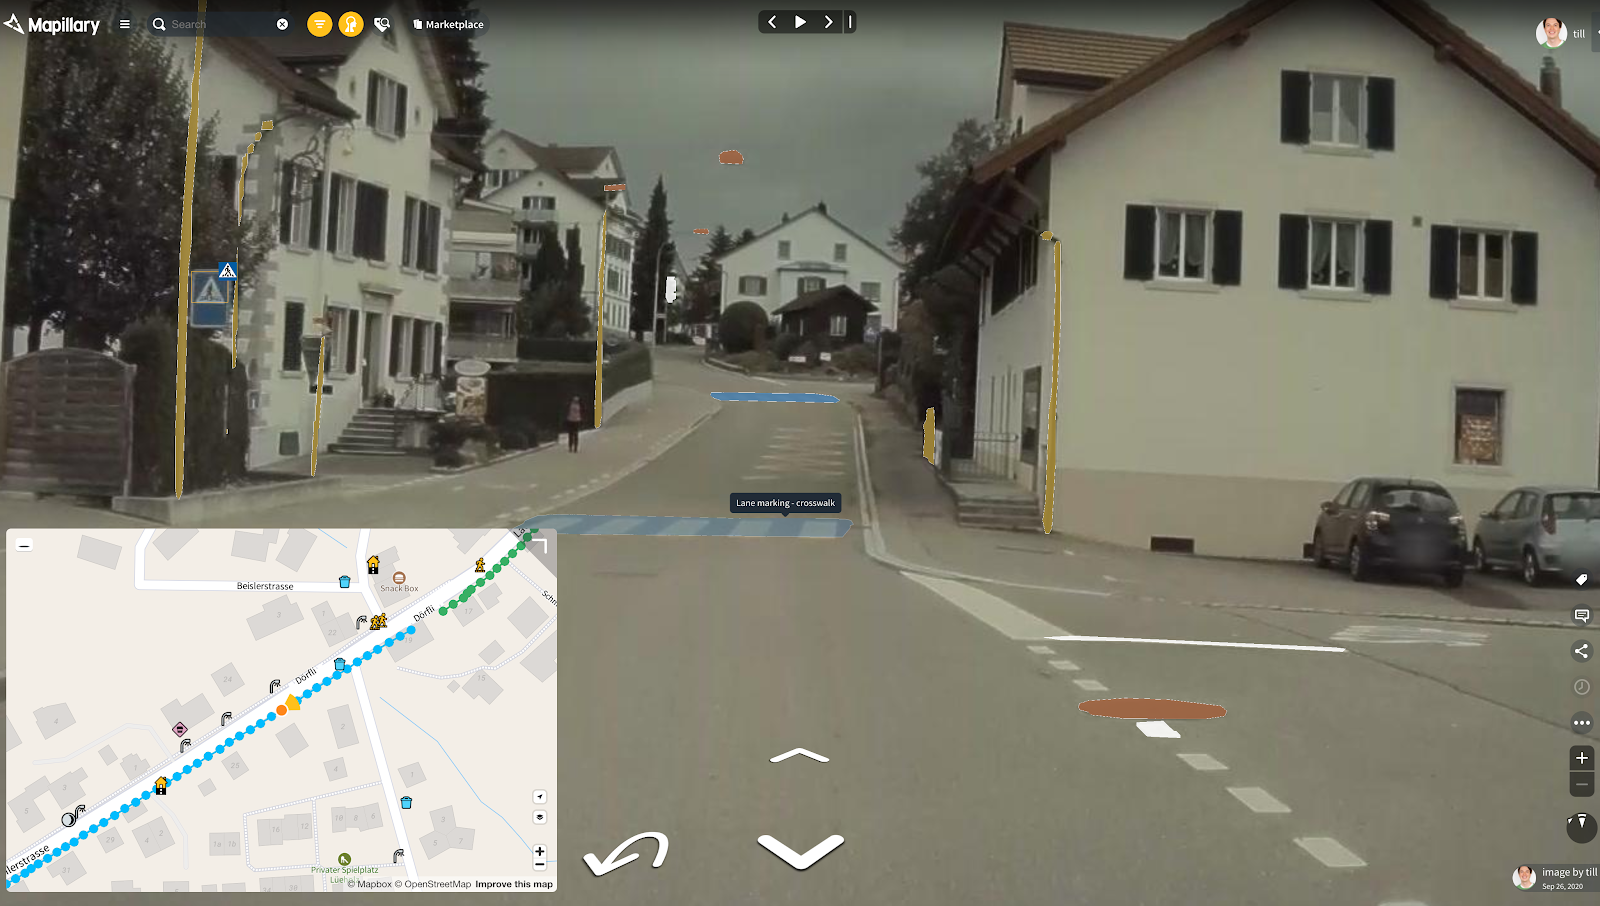
You can see a sample sequence on Mapillary here. A few things to notice:
- Having 4 cameras to capture simultaneously helps to provide a panoramic type view and high frequency. This is great for detecting objects and placing map features on the map.
- One downside is that the imagery for each camera is “only” in 1280 resolution and a little blurry. (However, when compared to a single consumer grade 360 camera the combination of the 4 cameras gives a decent number of pixels to work with.
- The images have a color scheme which is not the most optimal for enjoying the images for visual pleasure. However, for purposes of map editing the imagery is just fine.
A word on ease of use: with the Tesla dashcam you can get the ease of capture like a regular dashcam, but you get the additional benefit of a 4-camera setup without any hassle, and the benefits of vehicle integrated cameras.
Future work
The setup could be further simplified in terms of ease-of-use with an onboard GPS and automatic offload of the data at home.
One way to potentially use this is to use an onboard-computer like the Raspberry Pi. The teslausb project on GitHub enables you to plug in a Raspberry Pi into your Tesla in place of a regular USB Drive. The dashcam footage is then stored on the Pi. With a Raspberry Pi attached, you can now extend the Pi with a GPS module and write the GPS data right alongside the video files on the Pi. The aforementioned project also includes code to offload the video clips via Wi-Fi to a desktop computer automatically whenever the car enters home Wi-Fi. This could be extended to process videos right on the Pi and upload images directly to Mapillary.