How to Map Bus Routes and Infrastructure on OpenStreetMap

If you’re reading this, it’s likely you have already heard from Alyssa about the OpenStreetMap US Summer Bus Mapathon. If you haven’t, have a quick read of her blog post to learn more about the event.
The purpose of this blog post is to walk through the types of information you can gather on bus routes and how it can be added to OpenStreetMap. Let’s jump into it.
Gathering imagery
For the purposes of bus stop mapping, your best methods to capture imagery would be to drive the route, ride it on your bicycle, or hop on the bus and take imagery at key intervals. If you’re driving the route, you can mount your smartphone or action camera to your vehicle, making sure it’s level with the horizon and that none of the dashboard is in the image. We have smartphone mounts which you can request for free by filling in this form. Also, take a look at our best capturing tips.
If you’re riding the bus, sit at the front and do your best to capture imagery of each stop as you arrive.
Look out for:
- The bus stop sign
- Any shelter or structure
- Any seating
- Paths leading up to the stop and any wheelchair friendly infrastructure or lack thereof
Source imagery
When you use Mapillary for editing OpenStreetMap, it’s good practice to reference the imagery. This can help avoid confusion by showing other mappers that street-level imagery was used to draw your conclusions.
If you’ve used Mapillary imagery, you can reference it by using the Mapillary tag and setting the value = to the image key Mapillary provides. You can find the image key for any image on Mapillary by clicking the three dots on the bottom right, selecting additional options and copying the image key.
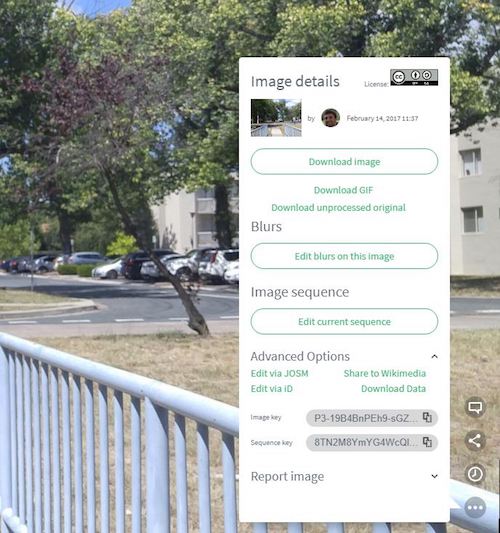
Another option is to choose the source tag and set the value = to Mapillary. The first method is more useful when there is a particular image that you want to reference. For example, you’re adding a statue to the map and would like to highlight the image so that others can later add more information.
Route information
We’ll start by adding route information for a bus stop in Canberra, Australia. We're going to be using the latest tagging schema, known as Public Transport Version 2 (PTv2). If we were adding this bus stop for the first time, PTv2 recommends that a node is added to the way corresponding to the bus stop, adjacent to the actual location of the stop. In this instance, we're adding a bus stop that doesn't have a dedicated platform. We're going to give the node a tag 'public_transport=stop_position'. To show it's a bus stop we add the tag 'bus=yes'. And of course the name 'Brisbane Avenue Police CLG'. If you know the network the stop is part of, that's useful information to add as well.
Next we add a node at the location of the bus stop on the side of the road. Here we give it the tags 'highway=bus_stop' and 'public_transport=platform' in addition to the name. This information won't be very useful unless we add route information as well. This is done using relations, with one relation for each direction of travel. To show that each of these relations are related to the same route, a master relation is created using the tag 'type=route_master+route_master=bus'. More info on this can be found here. Here we've added the relevant route information and a relation to connect the node on the road to the node placed on the location of the bus stop. If you have any troubles here, reach out to others in your locality to learn best case practices.
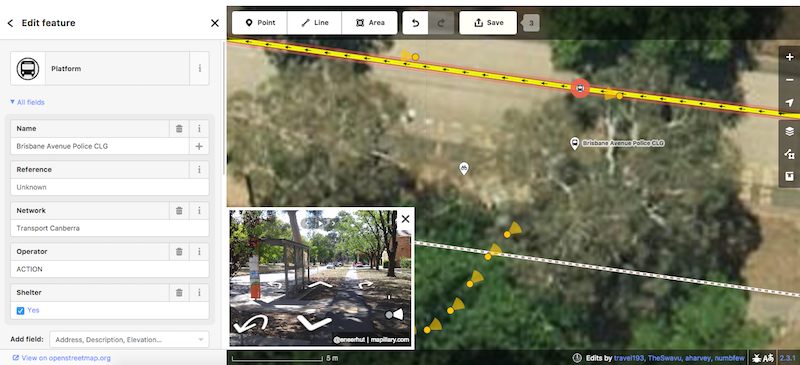 Adding bus stop node
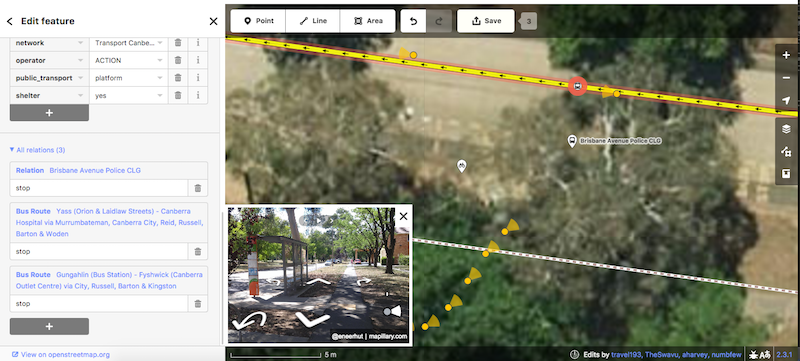 Adding route relations
A helpful way to get information on the entire length of the route would be to cycle or drive it with a camera mounted to your vehicle. This way you can get street-level imagery of every stop along the route.
Bus stop accessibility
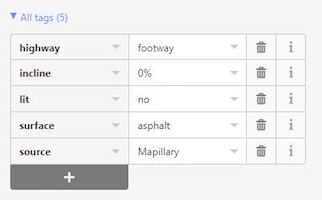
From the same image we can also get information on accessibility. This is an important consideration for people with different mobility abilities, but also for pedestrian routing tools in general as well as new visitors to the area.
We can add information on the paths leading to the bus stop such as the designated use (pedestrian, bicycle, horse), whether the path is illuminated, the actual surface type, and the extent of the incline. Notice the use of the source tag with a value source = Mapillary.
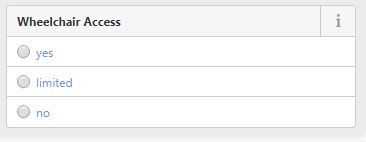
On the bus stop node itself we can add a tag with the key Wheelchair Access and the value yes.
All of the data you input here is of great benefit to projects such as Wheelmap.org and OpenSidewalks which help pedestrian routing for the mobility impaired.
Amenities
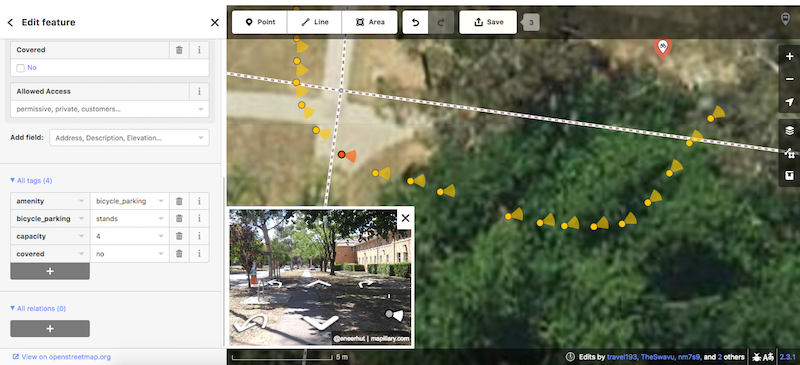
In addition to accessibility information, there is a also a lot of data that you can add regarding the available amenities at a bus stop. Walking through the sequence below, we notice a bike stand on the left-hand side. This is useful information for someone who may be thinking of riding to their nearest bus stop and taking a bus to the city. In OpenStreetMap we can add the type of bike stand that is available, the number of bikes that can be stored, whether the bikes are sheltered, and details on who can actually use the bike stand.
We can also add information on the facilities available at the bus stop itself. Is the bus stop sheltered? Does it have a bench? Is there an electronic display with bus arrival times?
That’s all there is to it! Contributing to OpenStreetMap with help of Mapillary images is pretty straightforward and very useful. The information you add is a massive help to the mobility impaired and bus-riding public. Here are some other bus route sequences to inspire you to get out there and map yours.
Approaching a bus stop in Canberra, Australia (captured while walking)
Passing a bus stop in Canberra, Australia (captured while driving)
Approaching a bus stop in Lund, Sweden (captured while walking)
If you need more help, check out the mapathon wiki or ask us for support.
/Ed
The original version of this blog post referenced outdated tagging schema. This was identified by Éric and has now been amended. Thanks for picking up on this!